Sunday, June 26, 2011

Strawberry Cloud Cakes


For some time know I have wanting to try out a meringue icing, so I decided that these little babies were  a must Sunday try. Here is the recipe if you want to give them a shot yourself

Strawberry Butter cake
90g softened butter
1/2 tsp vanilla extract
1/2 cup caster sugar
2 eggs
1 cup SR Flour
2 tbs milk
2 tbs strawberry jam
  1. Pre heat oven to 160º C in fan- force setting, Line 12 standards muffin pan
  2. Beat buuter, extract and sugar
  3. Add flour, milk and beat until mixture is pale in colour
  4. Divide mixture among cases and add jam over over cupcakes and using a skewer swirl jam into cakes
  5. bake for 20 mins and leave to cool
Frosting
1 cup caster sugar
1/3 cup water
2 egg whites
  1. combine sugar and water in small saucepan, stir over heat without boiling or stirring for abut 5 minutes. Syrup should be thick but not coloured
  2. Remove from heat allow bubbles to subside
  3. beat egg whites until soft peaks form
  4. while mixer is operating add hot syrup in thin stream 
  5. beat on high speed for about 10 minutes or until mixtures thick and cool

Kyle's Tennis Birthday Cake


I had the great pleasure in creating a cake for a very dear friends oldest child. Granted I was given free creative design and really no pressure. I really wanted to do this cake, firstly to gain more cake decorating experience and secondly to gauge the timing of doing cakes on my own.

I learnt a costly lesson, in using new items, DON'T DO IT..I tried to skip a step and buy a pre-made cake mix, it actually resulted in a super dry and crumby cake, so in the bin that went and a new mud cake from scratch was called for.

Armed with my trusty mud cake recipe, it was take 2, with success. I decided to make a square cake, inspired by Kyle's love of tennis. I also knew from many car journeys with Ms Toula that her husband often plays tennis with Kyle with very little skill.

Kyle's reaction was overwhelming and truly made the time spent absolutely worth it. He was amazed and said it was the best cake he had ever had. I guess that's my job done.

Until next time, Happy Baking xoxoKB

Monday, June 20, 2011

Raspberry Fangipane Tart


Note: Fresh dates, blueberries, strawberries, dessert figs or prunes, sliced apples or pears in place of raspberries. An alternative to orange is lemon rind

450g sweet short crust pasty (or for home made pastry see below)
1 cup frozen raspberries (alternatively use fresh raspberries or strawberries)
Icing sugar
Whipped or double cream
Almond slivers

Short Crust Pastry
1 1/2 plain flour
125 g butter, chilled and cut into cubes
1/2 cup icing sugar
3 egg yolks
1 tbs iced water
  1. Place flour, butter and sugar in a food processor and in short bursts mix until mixture resembels fine bread-crumbs.
  2. Whilst motor is on add egg yolks and water, until dough comes together. Turn dough into fkoured surface and bring together to form a ball. Flatten dough to look like disk and cling wrap and refrigerate for 1 hour.
  3. If you dont have a convention oven setting you will need to blind bake. Preheat oven to 180º C roll out dough between two sheets of baking paper and line tray (30cm) with pastry refrigerate for a further 30 mins.
  4. Line with baking paper and place weights , bake for 15mins.
Frangipane                                           
250g unsalted butter                              
1 cup caster sugar                                
1 teaspoon grated orange                      
3 eggs                                                    
250g almond mean                                
1/2 cup flour


  1. Preheat oven on Intensive Bake at 160º C with baking tray placed on shelf 1 (bottom)
  2. Cream filling: butter, sugar and rind until light and fluffy.
  3. Beat in the eggs one at a time, fold in the almond meal and flour, mix well.
  4. Spread frangipane evenly into pastry shell
  5. Arrange raspberries and almond on top
  6. Bake for 50 mins until set and golden
  7. Cool tart in wire rack for 30 mins before removing from tin.
  8. Serve tart dusted with icing sugar, serve with cream.
Serves 12.

Sunday, June 19, 2011

Oven Cooking Demonstration

I was fortunate enough to get a free cooking demonstration when I purchased my oven, granted it was nearly three years ago since it was installed, but better late than never. I had heard great reviews and it was a cooking class and free, so off I went to see how good it was

Ready to learn, I was pleasantly surprised with the service, after all I had already purchased the oven. I was greeted with a lovely cup of coffee and a divine pistachio and chocolate ganache macaroon. This afternoon was already looking to be great.


Whilst I love baking, I rarely use my oven outside of sweets and desserts so I wanted to learn how to make the most of this german beast and the other 12 settings that I have never dared to use.

Admittedly I wanted to purchase a few move oven accessories, wire rack, but after spending a couple hours with the lovely Kathy, I was converted, and no more wire trays instead trade them in for metal trays, your guests or partner will thank you.

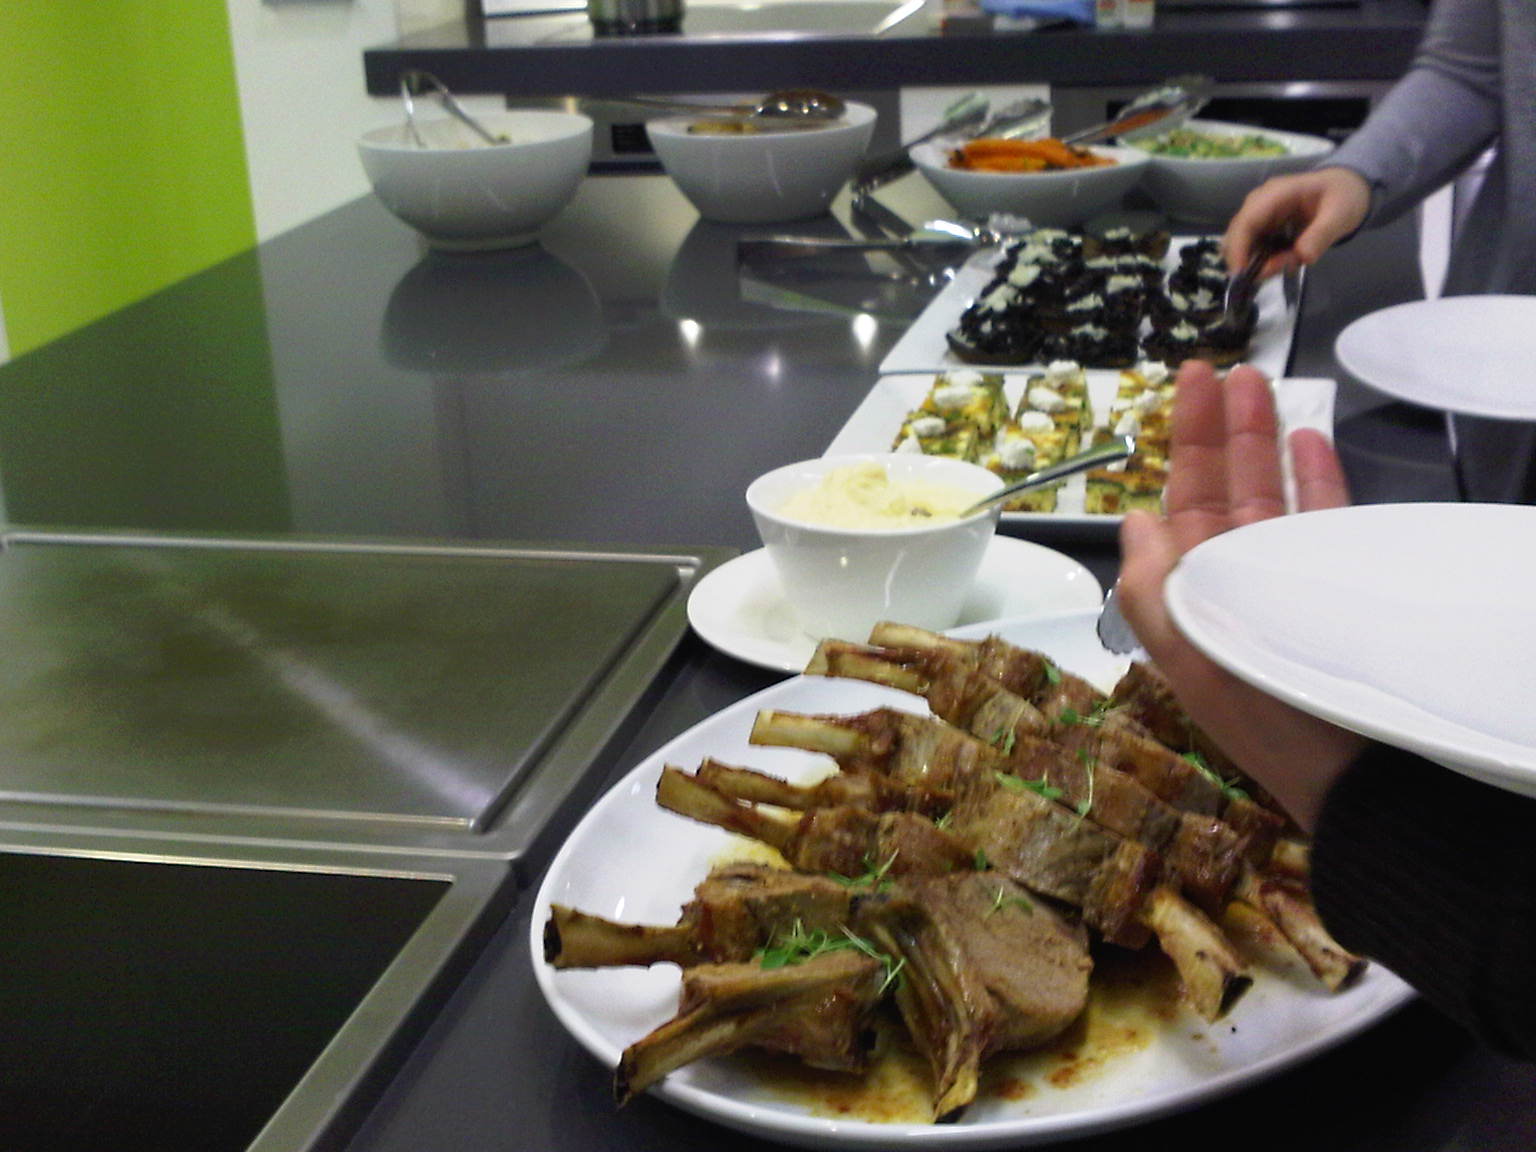
At the conclusion of the demonstration we were able to sample the food to prove there was no tricks, we had veal racks, with horseradish, fetta and vegetable frittata, stuffed grilled mushrooms, bakes potatoes, carrots and brussel sprouts. The food was amazing and was by far the best sit down meal I had in a long time. and for dessert a Chocolate Frangipane Tart was devine.


I am looking forward to many cakes that don't have uneven peaks or cracked tops, and no more blind baking for me, thanks to the convention bake option. I thought I would list a few of the key things I learnt. I don't think they apply to all ovens, but I would think if you have a newish oven that the same rules apply.

1. Avoid baking on wire racks, the metal ones tend to distribute heat more evenly.
2. Pay special attention to the shelf position when cooking (who knew that you don't just put everything in the middle?)
3. Take all trays out of the oven before you turn the oven, only leave what you require
4. Use baking paper on trays
5. If you have Intensive Bake as a option use it! It eliminates the need for blind baking, however you will need to place your pie, tart, pizza quiche on the bottom shelf, as the heat is distributed at higher intensities towards the bottom of the oven.

Stay tuned, I will scan add the guide they provides us for future reference